This term we have been creating live devices in the practical sessions.
We have followed this common steps to create a both live devices:
- We had to find and download an ISO image of our favourite open source OS. We have choosen Ubuntu.

To choose the version you mus take two aspects into account: the architecture of the processor (32bits/64bits) and the version you want to download (normally LTS versions are more stable, we have expalined it below). - We had to check the integrity of the ISO images that we had downloaded so we downloaded a MD5 sum checker such as MD5summer and the file containing the MD5 sum for the .ISO we had downloaded. You can find Ubuntu MD5 sums here.
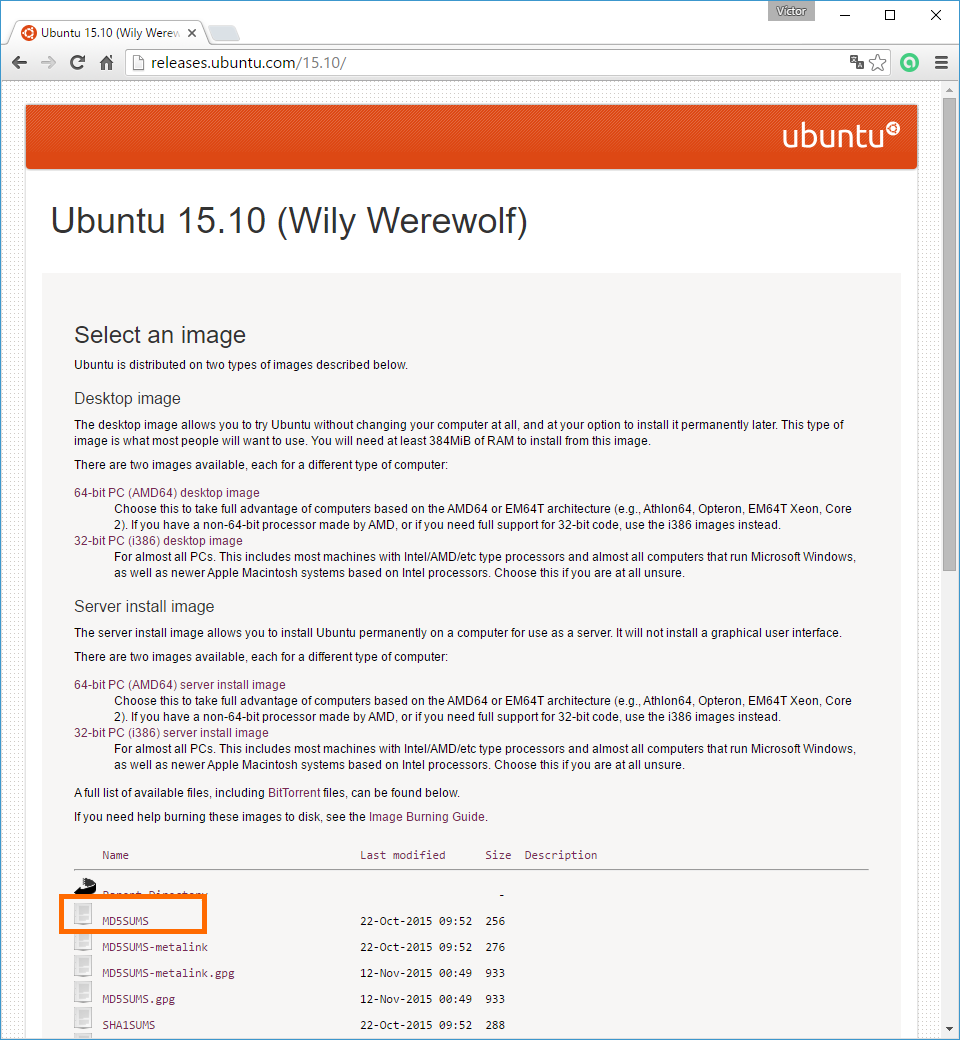
After choosing the version we had downloaded we were redirected to a similar page. We had to enter in the MD5SUMS. - Next we created a .TXT file with the MD5 sums.

We copied the contents of the MD5SUMS of Ubuntu web page (shown above) an we pasted them in a notepad (.TXT file). - We had to open MD5summer as administrator to continue with its steps.


Here is where the process changes depending if you are creating a live CD or a live pendrive.
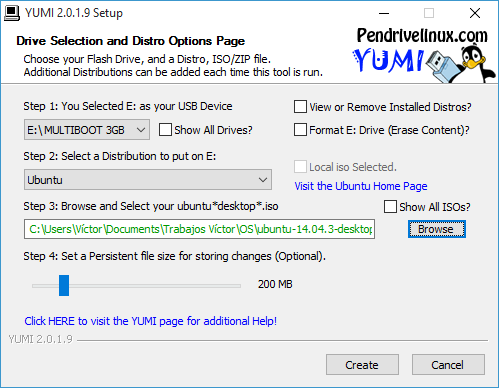
Live pendrive
A live pendrive is a multiboot device that can contain many OS to use them in your computer with or without instalation.
We downloaded an application to create multiboot bootable pendrives such as YUMI. Then we launched YUMI and followed its steps:


Live CD
A live CD is a boot device that contains one OS to install it in your computer.
We used Nero 2016 and an empty CD to create our live CD. Firstly we inserted a CD in the computer and then we launched the burning program.


Now we had created our own live devices, but we had to change some settings in our BIOS or UEFI to use it.
Here we had different experiences because this process may vary depending on the computer.
Víctor’s laptop
Firstly I aceed to my UEFI menu. In my laptop there is a special button to enter it.
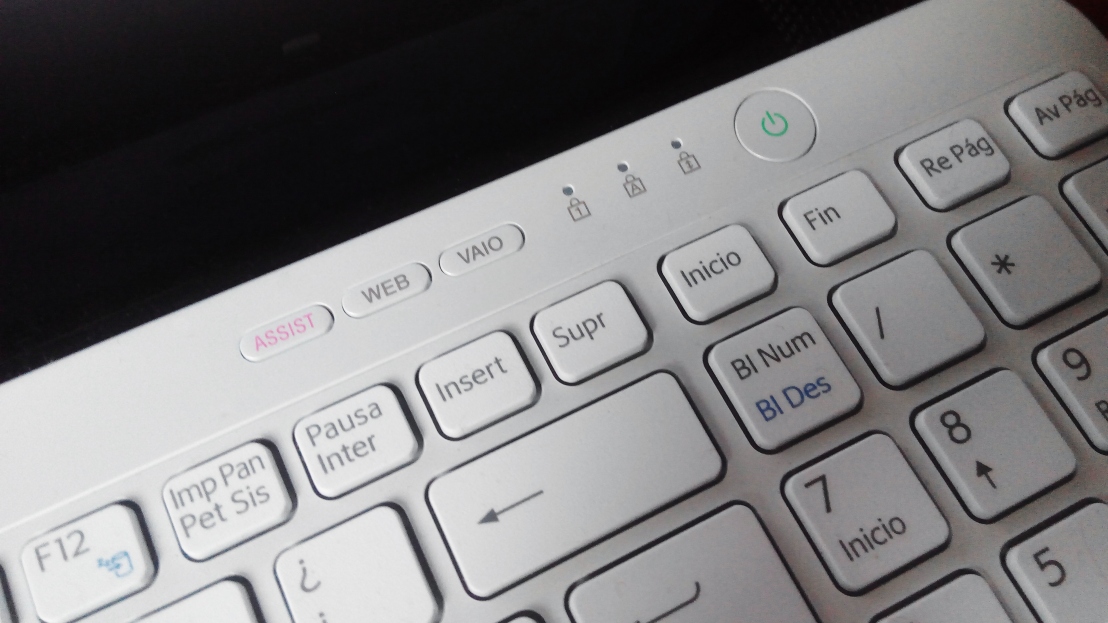
After doing that VAIOCare Rescue Mode was opened.

Then I had to configure the pendrive and the optical disk drive before the internal hard disk drive in the boot sequence, and change some other things.
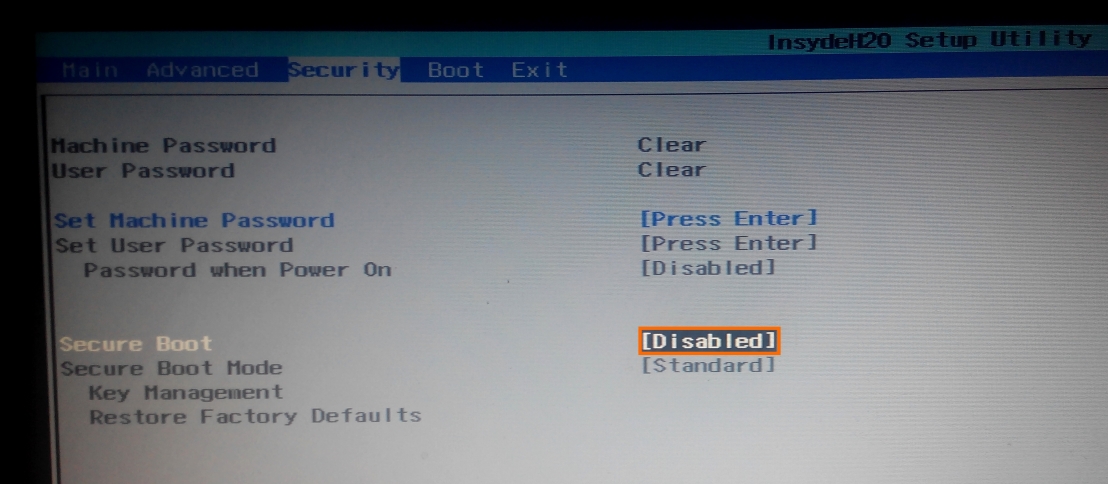

After this process I only had to reboot my computer with my live pendrive plugged in. My bootable pendrive launched YUMI, where I had to choose using the arrows the distribution I had saved in the pendrive.

Jaime’s computer
My computer is quite old and it doesn’t allow USB boot so I couldn’t use the live pendrive. 😦
Ubuntu
Ubuntu is a Debian-based Linux OS for PCs, smartphones and network servers. It is based on free software. Development of Ubuntu is led by Canonical Ltd. The Ubuntu project is publicly committed to the principles of open-source software development; people are encouraged to use free software, study how it works, improve it, and distribute it.
Ubuntu versions
There are two types of Ubuntu versions: LTS or normal releases. LTS stands for “long-term support”. LTS releases are designed to be stable platforms that you can stick with for a long time. Ubuntu guarantees LTS releases will receive security updates and other bug fixes as well as hardware support improvements for five years.If you stick with the LTS version, you’ll still get a new Ubuntu release every two years. In comparison, a regular release will only be supported for nine months. New versions of Ubuntu are released every six months.
LTS versions are designed to be more polished, while the standard releases bring you the latest features that may not be completely finished yet. When you use the latest release, you’ll end up upgrading every six to nine months. When you use the LTS version, you can upgrade every two years or even hold on for five years.
We have installed it in an old laptop that had Windows XP and now works really faster.
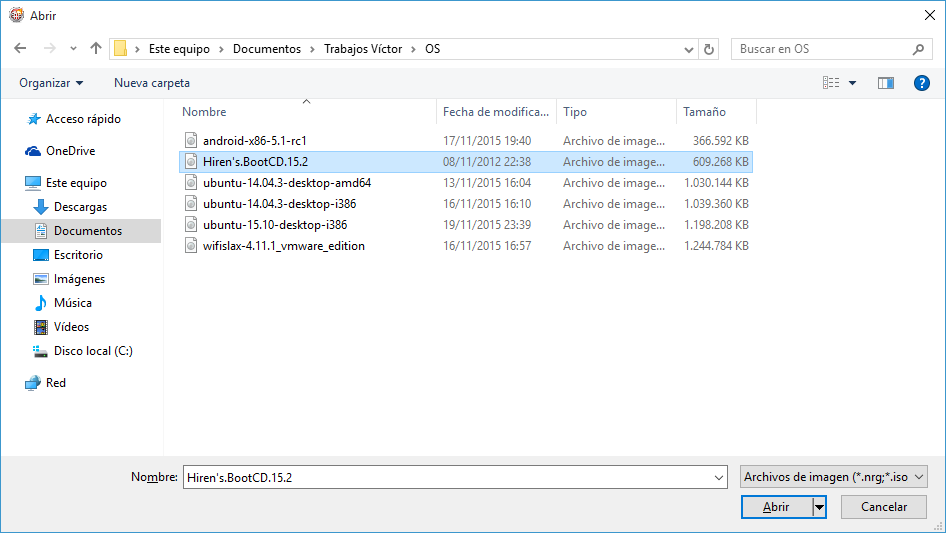
Hiren’s BootCD
Hiren’s BootCD is a bootable software containing a number of diagnostic programs such as partitioning agents, system performance benchmarks, disk cloning and imaging tools, data recovery tools, MBR tools, BIOS tools, and many other tools for fixing various computer problems. It can be considered a valuable tool for use in troubleshooting and recovery of computers.
We also tried it in our live CD, as explained above.

Conclusion
This is a really easy and useful process that anyone can do with their own computer.
In contrast to live CDs, the data contained on the live pendrive can be changed and additional data can be stored on the same device. It also provides the additional benefit of privacy and portability because users can easily carry their USB device that contains their preferred operating system, applications, configuration and personal files with them and use his or her own user in any computer.
Other tools, such as Hiren’s BootCD can be used to repair our computer, even when we can’t use its default OS installed on the internal HDD.
In our case, the most difficult part was entering the boot menu because in each computer this process is different, and probably the first time you will be scared of breaking your computer.
